Music Visualizers vs Static Art on YouTube: What Helps
Short answer: YouTube recommends videos that people click and keep watching, and a reactive visualizer gives a music upload something to look at, which can help keep viewers from closing the tab compared with a static album-art image. No one outside YouTube can promise a specific boost, but a clear title on screen, a strong first 15 seconds, a genre-matched look and end-screen links to your other tracks are sensible, low-cost ways to support watch time.
Last updated 21 October 2026. This article describes general practice, not guaranteed results; YouTube does not publish its ranking model.
What does YouTube's recommendation system look at?
YouTube has said publicly that recommendations are driven by how viewers respond to a video, including whether they click it and how long they watch, along with signals such as likes, shares and survey responses. Creators generally focus on three practical levers:

Photo: Lukas Blazek on Pexels
- Click-through rate: how often an impression of your thumbnail and title becomes a view.
- Watch time and average view duration: how long people stay once they click.
- Return viewers: whether people come back to your channel for more.
A music visualizer influences the second lever most directly, and the third through a consistent look.
Why can a visualizer hold attention better than a static image?
A music upload with a still image depends entirely on the audio to keep the viewer there. Much music viewing happens in a background tab, so the real risk is not that people stop watching but that they close the tab. A reactive visualizer helps in three ways:
- Visible confirmation. A glance at the tab shows motion timed to the track, confirming the right thing is playing.
- Reward for attention. When someone does look, the screen is worth looking at.
- Brand recognition. A consistent look makes your thumbnails and videos recognisable on repeat visits.
These are reasons it should help, not measured guarantees. If you want evidence for your own channel, compare average view duration in YouTube Studio analytics between a static upload and a visualizer upload of similar tracks. The same logic explains why lo-fi animated loops work well on long-running streams and uploads.
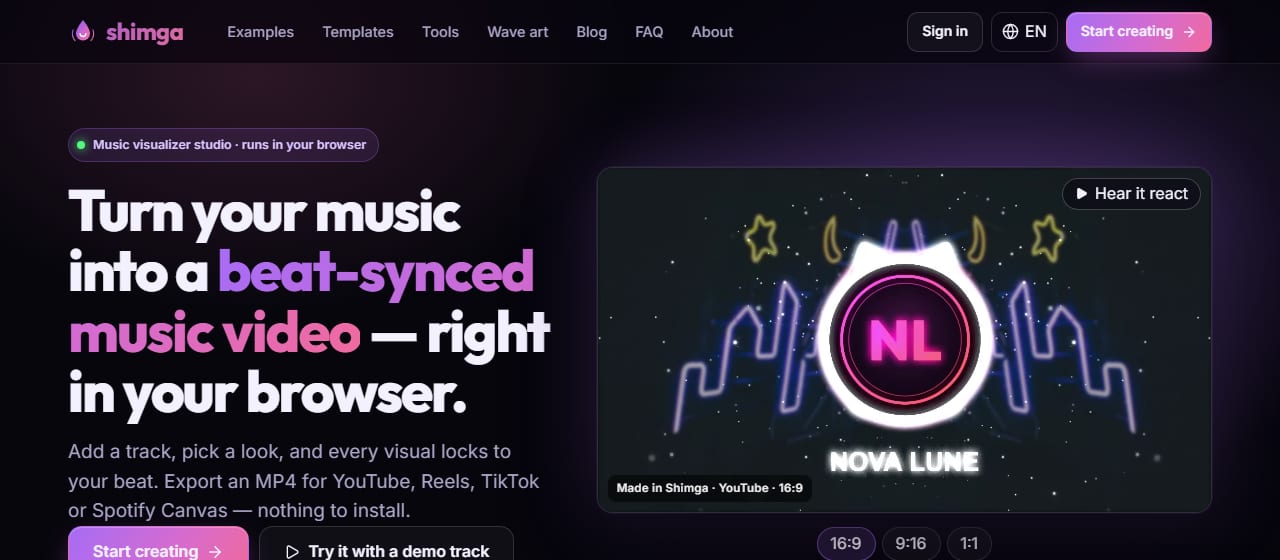
Screenshot: shimga.app
How should I design a visualizer video for YouTube? Step by step
- Put the essentials on screen at the start. Show the track title and artist name in the first seconds, so viewers know what they are hearing and can find it later.
- Start the visuals immediately. Avoid a long fade-in or a custom intro animation; viewers came for the music.
- Match the style to the genre. A circular spectrum with a centre logo is familiar in trap and EDM, a still anime-style background with subtle particles is familiar in lo-fi, and neon grids suit synthwave. See the Trap Nation style tutorial and colour theory.
- Brand it. Keep palette and logo position consistent across uploads. See adding a logo.
- Add an end screen. YouTube end screens appear in the last seconds of a video; use them to link to your other tracks or playlist so a session stays on your channel.
- Export at 16:9, 1080p. That is the standard for the watch page. See aspect ratios by platform.
What matters less than people think?
| Often over-weighted | Reality |
|---|---|
| 4K export | For most music uploads the difference from 1080p is hard to notice, and YouTube re-encodes anyway. 1080p is a sensible default. 2K and 4K export in Shimga require Pro. |
| Extremely dense visuals | A few well-placed elements usually read better than a storm of particles, especially on a phone. |
| Long custom intros | They delay the music and give viewers a reason to leave. |
| Keyword-stuffed titles | A clean "Artist - Track Title (Visualizer)" is easier to read and search. |
How should I write the title, tags and description?
- Title: artist name and exact track title, with a short suffix such as "(Visualizer)" or "(Music Visualizer)".
- Description: put the track title, artist, release date and streaming links in the first lines, because that is what shows before the "more" fold and in many search results.
- Tags: YouTube has said tags play a minor role, mostly for commonly misspelled terms. Add the artist, track and one or two genre terms and do not spend long on them.
- Thumbnail: reuse the cover art or a still from the visualizer so thumbnails look like part of one series.

Photo: Vitaly Gariev on Pexels
How do I make the video quickly in Shimga?
- Open Shimga Studio and add your track; building and previewing need no sign-in.
- Start from a preset or community template that fits your genre.
- Add your cover art as the background, your logo, and a text layer with the title and artist.
- Export a 16:9 MP4 at 1080p. No sign-in is needed; standard scenes up to 5 minutes do not need Pro (currently up to 4K). Pro is paid: $5 per month or $48 per year with a 7-day free trial, $3 for 6 Pro exports, or $131 + tax for Lifetime.
- Upload to YouTube and add an end screen linking your next track.
For tool-by-tool options see YouTube music video makers compared, and the dedicated YouTube music visualizer page. If you are new to the process, start with how to make a music video.
Frequently asked questions
Do music visualizer videos perform better on YouTube than static images?
There is no published guarantee, but a moving visual gives viewers a reason to keep the tab open and makes your channel more recognisable. Compare average view duration in YouTube Studio for your own uploads to see the effect on your channel.
What resolution should a YouTube visualizer be?
1080p at 16:9 is a sensible default for music visualizers. Higher resolutions are optional and YouTube re-encodes uploads, so the extra sharpness is often hard to see on music content.
What should be on screen in the first 15 seconds?
The track title, the artist name and an immediately moving, music-reactive visual. Skip long fade-ins and intro animations so the music starts right away.
Do YouTube tags still matter for music uploads?
YouTube describes tags as a minor signal. Include the artist, track title and a genre term, but put more effort into the title, thumbnail and first lines of the description.
Make your next visualizer video
Add a track, match the style to your genre and export a 16:9 MP4 for YouTube.
Open Shimga Studio →More: audio visualizers for YouTubers and audio-reactive visuals.